Problem:
I got into situation where I wanted to create the custom ribbon button in MS Dynamics CRM 2011 on the entity form as well as on the entity Grid main page.
Solution:
The following steps can be performed to achieve the target:
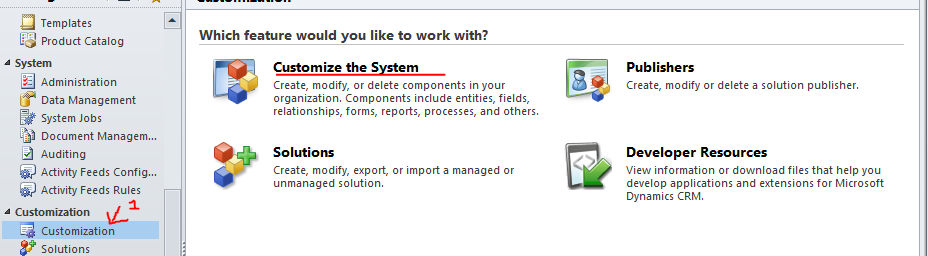
1. In CRM go to Setting->Customizations->Solutions.

2. In CRM 2011 go to
Setting->Customizations->Solutions. Click New to create the empty
solution
to export the entity for which you want to create the button (either on entity
form or on
Grid). Here I have taken example of Account entity.
Here publisher is the default publisher for your crm.
3. Add the account
entity to the empty solution. Do not include the dependent components in the
solution.

solution.

4.Export the solution
and don’t forget to publish all customization before exporting the solution to
ensure you have all updated customization for the entity.
ensure you have all updated customization for the entity.
5. Once you export the
solution unzip the solution and open customizations.xml file from the solution
folder.
folder.
6. Look for the tag <RibbonDiffXml> within customization.xml
file. You need to add code for
custom button within this tag. Since this is a custom operation we add a <customActions>
tag where we will add all our custom action to be done.
custom button within this tag. Since this is a custom operation we add a <customActions>
tag where we will add all our custom action to be done.
<RibbonDiffXml>
<CustomActions>
<CustomAction Id="Mscrm.account.Form.CustomAction"
Location="Mscrm.Form.account.MainTab.Actions.Controls._children"
Sequence="41">
<CommandUIDefinition>
<Button Id="Mscrm.account.Form.HelpButton"
Command="Mscrm.account.Form.HelpButton.Command"
LabelText="$LocLabels:Mscrm.account.HelpButton.LabelText"
ToolTipTitle="$LocLabels:Mscrm.account.HelpButton.LabelText"
ToolTipDescription="$LocLabels:Mscrm.account.HelpButton.ToolTip"
TemplateAlias="o1"
Image16by16="$webresource:scc_imghelp16x16"
Image32by32="$webresource:scc_imghelp32x32" />
</CommandUIDefinition>
</CustomAction>
</CustomActions>
- Here we added one custom action with location attribute. Note location attribute is important as it determines the exact position in your CRM entity ribbon where your custom button will be displayed. Here the button will be displayed on Account form ribbon in Actions Group
- Sequence determines the order of button display if you have more than one button displayed in Actions group. Sometimes if you don’t mention proper sequence then your button might not appear in correct order in group.
- Now we need to add commandUIDefinition tag and then define a Button within it.
- For the labelText, ToolTipText , ToolTipDescription we have defined the local labels. If you want you can directly assign text values while defining the button.
- For image displayed on button you need to create webresources for each 16x16 and 32x32 size. (check here on how to create image web resource)
7. Next step is to locate/Create <CommandDefinitions>
tag. Add
following code.
<CommandDefinitions>
<CommandDefinition Id=”Mscrm.account.Form.HelpButton.Command”>
<EnableRules>
<EnableRule Id=”Mscrm.account.WebClient.EnableRule” />
</EnableRules>
<DisplayRules/>
<Actions>
<JavaScriptFunction FunctionName=”HelpFunction”
Library=”$Webresource:Launch_Help.js” />
</Actions>
</CommandDefinition>
</CommandDefinitions>
- This section defines the action for the button. So we “id” value of <commandDefinition> tag contains value of command attribute defined in button tag.
- Enable rule – defines conditions when you want to enable the button.
- Display rule – defines the display condition for button.
- Actions
– defines the action to be performed when the button is clicked. Here we are
calling a javascript function (HelpFunction) defined within webresource (Launch_Help.js).
8. Next step is to
define the enable rule in <RuleDefinitions> tag.
<RuleDefinitions
<TabDisplayRules />
<DisplayRules />
<EnableRules>
<EnableRule Id="Mscrm.account.WebClient.EnableRule">
<CrmClientTypeRule Type="Web" />
</EnableRule>
</EnableRules>
</RuleDefinitions>
9. Lastly add local
Labels containing text and tooltip for button.
<LocLabels>
<LocLabel Id="Mscrm.account.HelpButton.LabelText">
<Titles>
<Title languagecode="1033" description="Help" />
</Titles>
</LocLabel>
<LocLabel Id="Mscrm.account.HelpButton.ToolTip">
<Titles>
<Title languagecode="1033" description="ToolTip for the
button" />
</Titles>
</LocLabel>
</LocLabels>
</RibbonDiffXml>
10. Once the code has
been added save the file and zip the solution containing all three files
together.
11. Import the updated solution back and publish
all the customization. You should see the button
on the Account form in Actions Group.
on the Account form in Actions Group.


All the steps and code mentioned above remains same just need to change the location of the button in <customAction> tag
<CustomAction Id="Mscrm.account.Homepagegrid.CustomAction"
Location="Mscrm.HomepageGrid.account.MainTab.Actions.Controls._children"
Sequence="41">
We changed the location now to HomePageGrid of Account entity instead of Form. Everything else remain same.
When you place button on the HomePageGrid of any Entity and you want to allow button to be enabled when user select only one record from grid. You can add following enable rules to achieve this task.
<CommandDefinition Id="Mscrm.opportunity.grid.HelpButton.Command">
<EnableRules>
<EnableRule Id="Mscrm.opportunity.WebClient.EnableRule" />
<EnableRule Id="Mscrm.opportunity.OneSelected.EnableRule" />
<EnableRule Id="Mscrm.opportunity.OneSelected.EnableRule" />
</EnableRules>
<DisplayRules>
</DisplayRules>
<Actions>
<JavaScriptFunction FunctionName="ExecuteFunction"
Library="$Webresource:scc_Help.js" />
</Actions>
</CommandDefinition>
Now defining the enable rule:
<SelectionCountRule AppliesTo="SelectedEntity"
Maximum="1"
Minimum="1" />
</EnableRule>
Thanks,